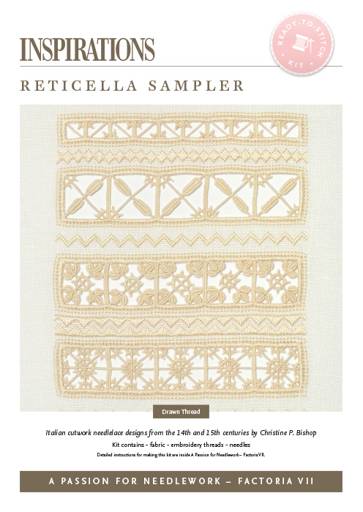
Reticella Sampler by Christine P. Bishop
20TH SEPTEMBER 2019 - ASU #204
An internet search for reticella, a form of needlelace that originated in Italy, reveals astonishingly beautiful and intricate geometric designs, particularly for ornate collars and cuffs of the 16th and 17th centuries as seen in painted portraits.
It’s amazing to think that this enchanting and detailed lace was created as much as 500 years ago by a person plying needle and thread using the same materials we have readily available to us today.

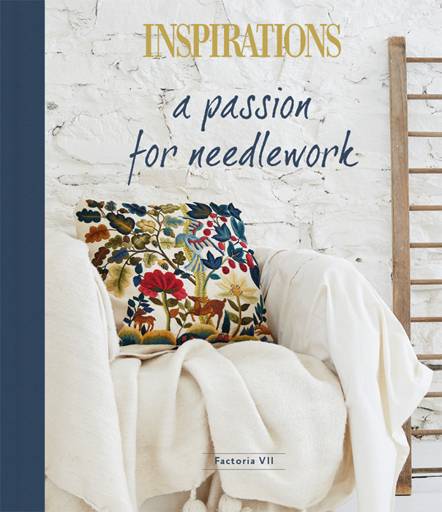
The knowledge of how to work such remarkable designs is, however, less accessible. Could we make anything like that today? Christine P. Bishop, a passionate researcher, embroiderer and teacher of whitework and needlelace, designed a sampler that is a master class in reticella, and we were thrilled to have featured it in our book A Passion for Needlework | Factoria VII.

Reticella began as a form of cutwork in which threads were removed, horizontally and vertically, from the ground fabric, leaving a grid of ‘cells’ for working the needlelace patterns. The edges of the cut areas were reinforced, and diagonal threads were laid in across the cells to stabilise the open spaces.

As the cells became larger, additional threads were laid in to support the needlelace, and eventually reticella was worked without a ground fabric and was instead based on a braid or thread framework, ideal for the creation of lace collars and cuffs.

Christine’s sampler is fabric-based reticella. Working through the sampler, the designs build on the techniques used in previous rows, increasing complexity in a logical progression that mirrors the development of reticella through time.
We’ve included close-up photographs of the needlelace design in progress for each panel to help guide you along the way.
So, where to begin? The first step, after preparing the fabric with lines of tacking to mark out the panels, is to edge the panels with satin stitch and four-sided stitch. It’s important to work this edging as firmly as you can, as it will be holding all the thread tails as you work.

It can be embroidered with the fabric held in your hand, however you will need to work the needlelace with the fabric held in a frame to assist with maintaining even tension. If you prefer to work with a hoop rather than a frame, use a 15cm (6”) hoop, moving it as needed and removing the fabric from the hoop between stitching sessions to prevent permanent hoop marks on the fabric.

Next, take a deep breath and carefully begin to cut and remove the threads as needed for a panel. You want the fabric to remain as stable as possible for working the needlelace, so it’s best to only remove the threads from a few cells at a time for the row you are working on.
The needlelace begins with two panels based on reticella from the 14th century. Needlewoven bars form the grid of cells across the cutwork area which are stabilised with characteristic diagonal bars of wrapped laid threads and decorated with arches of detached blanket stitch. The arches in the second panel are further embellished with Venetian picots.

These were traditionally worked using a horsehair to form the tiny loop, however sewing thread is a perfect modern substitute and allows very fine picots to be formed. Venetian picots are worked throughout the sampler, so we included a step-by-step guide to help you master these dainty essentials.
The third panel is based on reticella from the 15th Century, when cells had become larger. The grid is defined by needlewoven bars as before, with two diagonal wrapped bars per cell, along with decorative picot arches. It’s important not to distort the wrapped bars by resting your fingers on them or lifting them up from beneath while working them.

This risks adding extra length to the bars, detracting from their neat structure. The beautiful ‘step-up’ for this panel is the addition of needlewoven lozenges, like large leaves, along alternating wrapped bars. A thread is laid around a wrapped bar in an oval shape, creating a foundation for the needleweaving.
The fourth panel is also based on 15th century reticella and is particularly captivating with a trio of small leaves at each corner of each cell. Additional wrapped bars are laid in at the corners to support these needlewoven leaves, which are small versions of the lozenges in the previous row.

A circle of thread is laid at the intersection of the wrapped bars and covered with detached blanket stitch embellished with Venetian picots. It is a more intricate design, however it is made using the same techniques seen in previous panels.
The widest panels, rows five and six, are based on reticella from the 16th and 17th centuries. The motif of the fifth row shows the use of additional horizontal and vertical supporting wrapped bars and extensive use of Venetian picot-embellished arches and circles. The sixth panel shows how different motifs can be combined to create an elaborate band of lace.

Finally, the ground fabric between the reticella panels is embroidered with satin stitch motifs, further enhancing the play of light and texture across the sampler.
You don’t have to be a reticella expert to begin this sampler; it has been designed to help you build up your skills and confidence as you go along.
If you’ve always wanted to try reticella, this is the perfect project to make a fabulous beginning! Remember, you can only work with one thread at a time, so by concentrating on one step at a time, it will all gradually come together with a beautiful result.
Make Your Own Reticella Sampler

Step 1 – Purchase Project Instructions
Reticella Sampler by Christine P. Bishop features Italian cutwork needlelace designs from the 14th and 15th centuries.
Printed Book
A Passion for Needlework 2 | Factoria VII
Shop NowStep 2 – Purchase Ready-To-Stitch Kit
The Inspirations Ready-To-Stitch kit for Reticella Sampler includes everything you need to re-create this elaborate sampler: Fabrics (unprinted), embroidery threads and needles.
Please Note: To cater for flexibility of purchase, instructions are not included with our kits. For step-by-step directions on how to create this project, please refer to the book.