Flowers for Elizabeth – The Pinwheels
3rd February 2023
Last week we embarked on a journey of discovery learning all about how Susan O’Connor created her blanket for the book Flowers for Elizabeth.
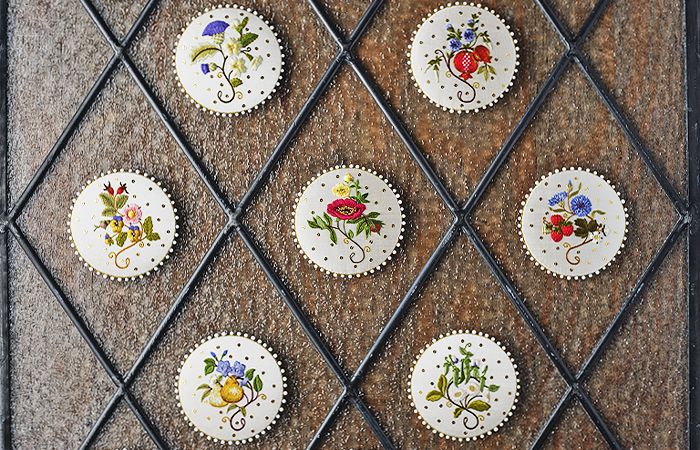
This week we’re continuing that journey, but this time hearing from Susan as to how her stunning collection of 12 Flowers for Elizabeth pinwheels came to be.

We’ll start by going back in time to 2010 when Susan had just put the finishing touches on the blanket and was due to finalise her project line up for her upcoming trip teaching at the Smocking Arts Guild of America (SAGA) national convention.
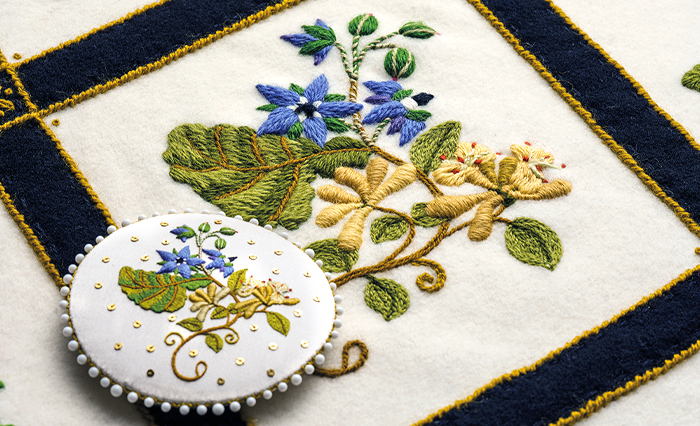
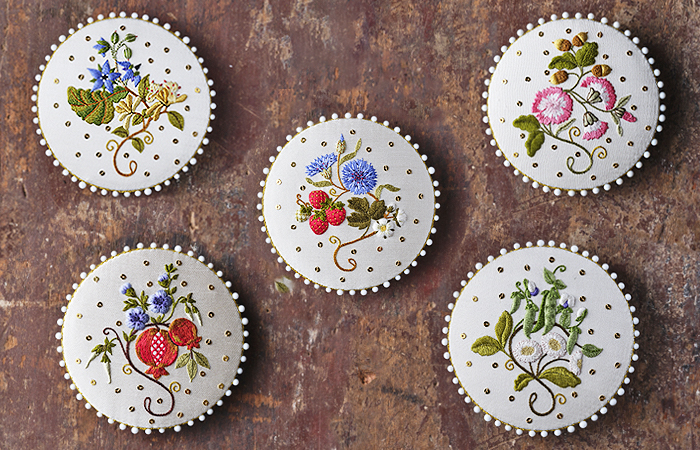
Borage & Honeysuckle
In search of some new projects to teach her loyal students, Susan had the idea to take a couple of the hero motifs from the blanket and create smaller versions as individual standalone projects.
‘When selecting a project to teach, I’m looking for just the right balance between an appealing design that’s challenging enough to expand a student’s skill, yet small enough to complete most of during class.
So I reduced the sketches of my two favourite Flowers for Elizabeth motifs by 40%, transferred them onto a piece of silk duchess satin and re-created each motif using the same colours and shading, only this time with silk threads.’
‘The end result was, after scaling down the design and the size of the thread to match, I had a project that was perfect to teach.’
One of the things we love about the book Flowers for Elizabeth is that you see the motifs in both wool and silk side by side in incredible detail, which as a stitcher really helps you to appreciate the differences between thread types.

Heartsease & Eglantine
Out of all the needlework accessories to choose from, we were curious as to why Susan decided to use her newly re-sized designs to create pinwheels…
‘I love a good pinwheel, don’t you? They are a lovely decorative yet functional item to create, and a good size too, making them quick and easy to work up.
Best of all they make wonderful gifts for any fellow stitcher, many of which I’ve given away myself.’
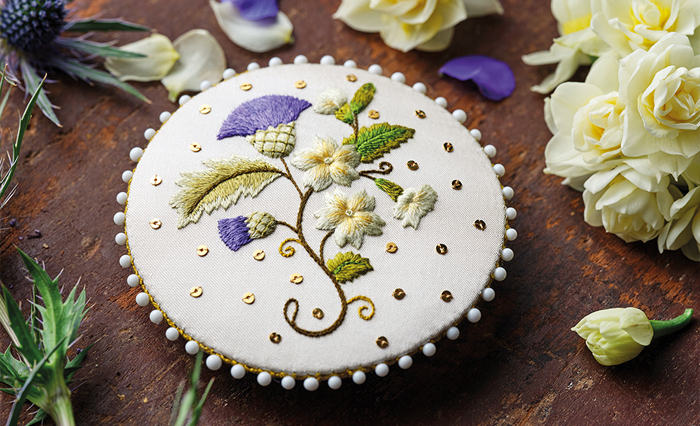
Primrose & Thistle
Next, we asked Susan why she chose the combination of the silk fabric and silk threads rather than perhaps linen fabric and cotton threads.
‘Well firstly my choice of materials is always based on what I enjoy working with. There is great pleasure in finding threads and fabrics that are a joy to use.
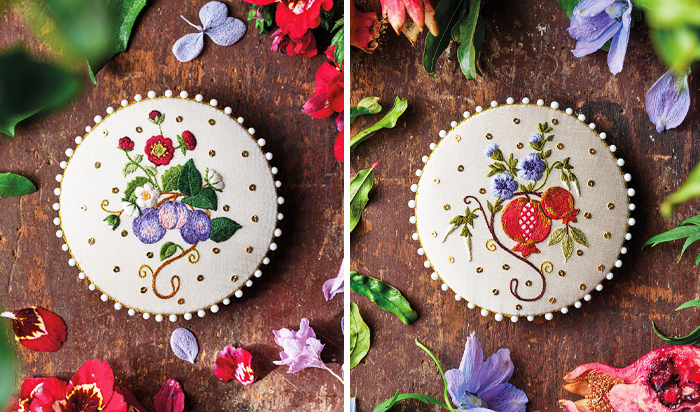
L – Plum & Cinquefoil | R – Pomegranate & Cranesbill
‘With the fabric, silk satin has a complex weave, which means it has very firm properties and holds stitches firmly in place. It is also a very stable fabric in that usually you’ll find some elasticity in the weft that can lead to a circle becoming an oval when the fabric is tightened in a hoop, but this doesn’t happen with silk satin.
Then I discovered that I preferred stitching on the back or ‘wrong side’ of the satin instead of the front.
The front of the fabric has a satin sheen that is beautiful but is easily distorted by stitches, however the back has a lovely matte finish and is resistant to distortion which is important when working on smaller more intricate designs.’
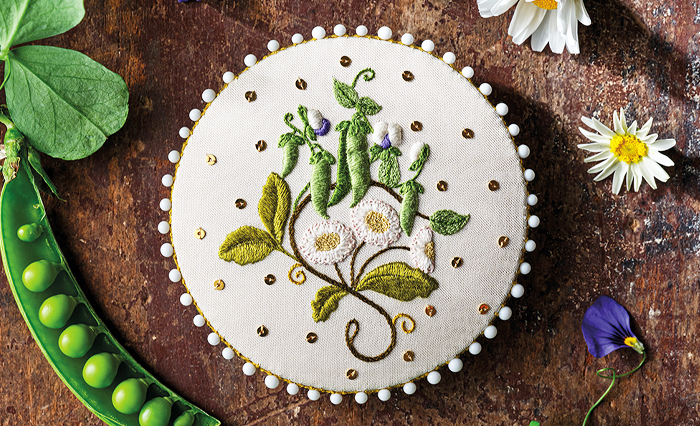
Pea & English Daisy
That’s good to know and it’s very innovative of you to even consider stitching on the ‘wrong side’ of a piece of fabric. How about silk vs cotton thread?
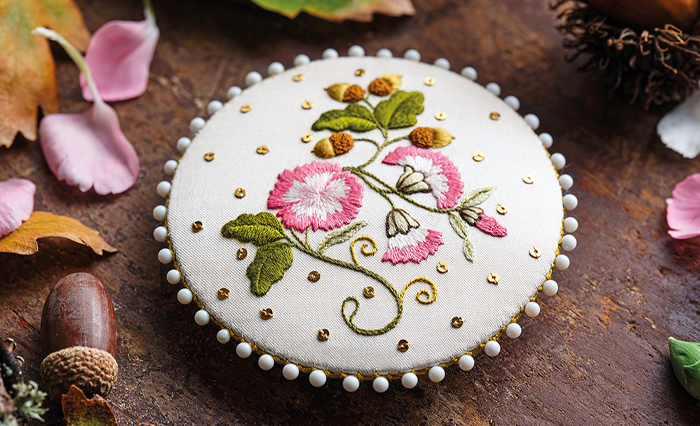
Acorn & Gillyflower
‘That comes back to my initial note about finding materials I enjoy working with. Au Ver à Soie are my favourite small format threads to use as their colour range is unrivalled, and I chose silk thread because of the sheen and lustre that I feel really elevates the finish of the completed design.’
Susan’s affinity with Au Ver à Soie silk threads is well documented. Anyone who has studied her work will attest as to how often the words ‘Au Ver à Soie, soie d’Alger’ appear in the requirements list!
In fact, here’s some fun trivia for you; Susan was one of 30 artists invited to include their work in the official ‘200 years of Au Ver à Soie Commemorative Book’ released in 2020 where you can find her Flowers for Elizabeth Peony and Buttercup pinwheel.

Peony & Buttercup
And here we are yet again exceeding our word count before telling you everything we learned from our chat with Susan.
Let’s squeeze in three quick things we simply must share before we go:
1/. – We asked Susan for her best pinwheel hack:
‘Find a round cup or glass roughly 8cm (3”) in diameter and use it as a template to create your cardboard pieces for the pinwheels. Next hold the pieces together and sand the edges so they are a perfect mirror.’
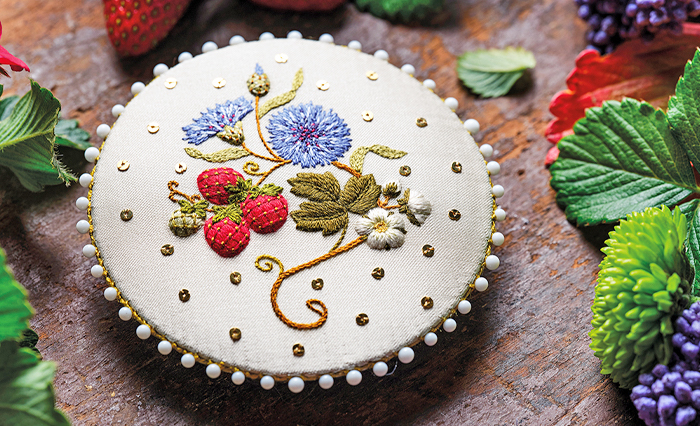
Cornflower & Strawberry
2/. – Where do you start when stitching each motif?
‘I stitch the stems first as this creates the framework for the other elements, then I stitch the flower, next the leaves and finish with the smaller details.’
3/. – What tip can you give us before we create our own pinwheels?
‘During the construction ensure you lace the back really well and pull the fabric firmly over the card. It’s worth taking the extra time to get this right as it will make a big different to the end result.’
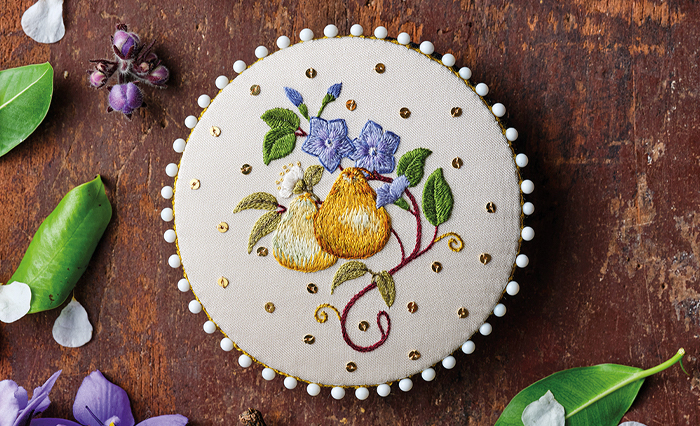
Pear & Periwinkle
Thank you Susan! So much to learn and so much to discuss but for now make sure you get a copy of the book Flowers for Elizabeth, pick your favourite motif (there are 24 to choose from) buy a Ready-to-Stitch kit and start stitching yourself a pinwheel. Then try stopping at just one…
Make Your Own Pinwheels
Step 1 – Purchase Project Instructions
Flowers for Elizabeth Pinwheels by Susan O’Connor are lovely decorative yet functional items to create.
Flowers for Elizabeth
Step 2 – Purchase Ready-To-Stitch Kit
The Inspirations Ready-To-Stitch kit for each Flowers for Elizabeth Pinwheel includes enough threads to also stitch the motif onto a scissor sheath and needlebook.*
Flowers for Elizabeth | Pinwheels
Scissor Sheath – FFE Kit
Needlebook – FFE Kit
*Please Note: To cater for flexibility of purchase, instructions are not included with our kits. For step-by-step directions on how to create this project, please refer to the book.