Have Your Say
26th August 2022

Tales From The Backpack
We all have a stitching ‘backpack’. This isn’t necessarily a physical backpack (although it may well be for some people). Rather, it is a metaphorical pack that is filled with all the important things we need to make our stitching journey easier. We wrote about this in All Stitched Up! issue #341, which garnered some wonderful responses from the community.

Deb Culbertson wrote that she likes to have all her important tools close to her when she stitches, even if she doesn’t use them every time. She’s even made special books to hold them all. She changes books every time she changes projects because she’s made 25 of them to date!
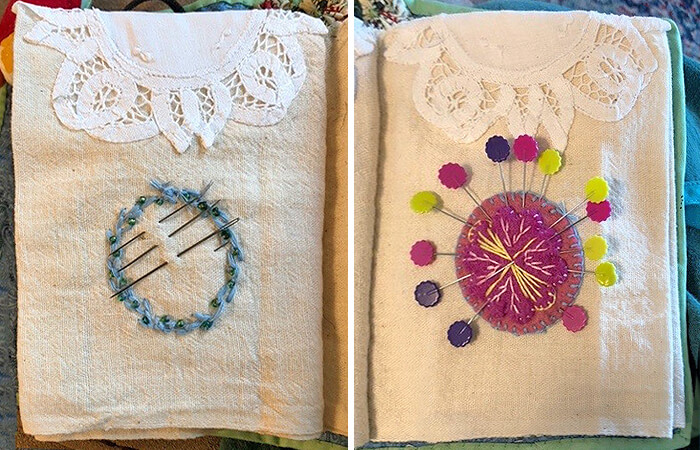
Included in her ‘backpack’ are a range of needles that she can use for all kinds of threads, including the beads and special threads she loves to embellish her work with. She always has sharp scissors, a lovely antique stiletto, and a silver seam ripper with her name etched on it. She never likes to rip out stitches, but the feel of this beautiful tool makes the process bearable.
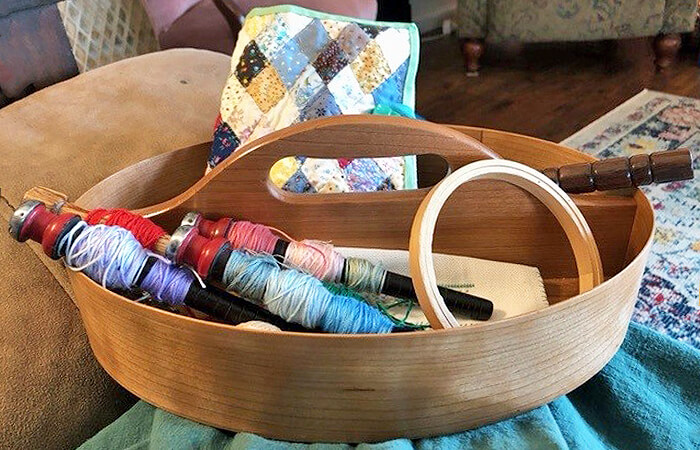
Finally, she has a beautiful wooden container that holds her book, hoop and threads perfectly. It even has room for her hand lotion. Stitching heaven!
Ben is lucky enough to have plenty of room for stitching, with a 4 x 4 foot adjustable floor frame. Ben can work on large pieces or multiple pieces at once, with other tabletop and smaller floor frames to hand. With a clamped-on magnifier, light, thread holders and an easel for the pattern, it is a set-up that would be the envy of many.

Lydia Lyubashenko wrote to us from Russia to tell us about her ‘backpack’ and the comfort it brings her. Her family live in Ukraine, so she is currently facing worries and uncertainties about the people she loves and the future in general. When the difficulties began in February, Lydia turned to her stitching box. She started organising it, putting her needles in order or making a sheath for her scissors. Any time she felt like crying, she would go back to her box.
‘It felt as if I was organising not the box, but my inner self. Putting it in order helped me feel as if I was getting prepared for any future that may come.’
Lydia said that she is so grateful to have her box. It is sanity in her sewing backpack.
Now, whenever she needs some kind of meditation, she reorganises her box. It is probably the most organised sewing box in the Western Hemisphere now! That gives her the calm to carry on with her life.
In that same issue of All Stitched Up! we posed a question to our community that had been sent to us by Cristina from Italy. She was interested to know how to accurately join two pieces of printed fabric. Fortunately, we have people in our community with a wide range of skills and talents, so we received some fantastic replies.
Sandie Bero suggested folding the raw edges of the pieces of fabric over approximately 1/2” (13mm). The next step is to find where the pattern matches, then use lots of pins to secure it. Sandie then uses a blind stitch to join the pieces, also known as slip stitch or invisible stitch. She says that although it takes careful stitching, once it is pressed you can hardly see the join.
Roberta Kenney once again sent us a fantastic set of step-by-step instructions. As both a seamstress and embroiderer, she put her two skills together to come up with a solution. Her answer is:
- Determine the sizes of the patterns to be joined.
- Determine the grain of the two pieces. Are the edges on grain or on the bias?
- Measure the edges to be joined.
- Choose the length of stitch to use based on the size of each pattern print. In the USA, she suggests 8-10 stitches per inch (2.5cm) whether stitching by hand or machine.
- Choose an embroidery floss colour common to both patterns to top stitch the seam, visually blending the two fabrics.
Roberta said that these steps are particularly useful for quilting but can also be used for other projects that require the joining of printed fabrics.
Finally, Roxanna Hauschild noted that American Quilt Fabric, which she assumes means printed cotton, is printed with repeats of various sizes and lengths. The first thing she does is lay the fabric flat, then figure out where the repeat starts. She then cuts the selvage off, and lays the cut piece next to the fabric, moving it up and down till the pattern matches.

Once she has a match, she finger presses the piece she’s adding, then irons the line as accurately as possible. Lay the fabric with the ironed edge on the table, open the crease, pin close to the crease and then baste. Just make sure it doesn’t move! Roxanna says that she always checks for the first few pins to make sure things aren’t shifting, but she almost always gets an accurate match.
Hopefully this will give Cristina, and everyone else, some useful knowledge to take into their own projects. Aren’t we fortunate to have such a talented and generous community? We can’t help but be thankful every day that we get the pleasure of working for such an amazing group of people.